
5 Tips for Taking Stellar Night Photos
Chasing the Milky Way...and capturing it!
My mom says that when I was two, I would look at the moon and call it to sit on my head. This celestial fascination matured into a love for the cosmos and today, when I am under a brilliant night sky, I am again my two-year-old self. This passion for the stars has resulted in an endeavor to capture stunning night imagery that communicates the emotions I feel when gazing skyward.
The photographs you see in this story are results of this pursuit and I am excited to share this love with you. Starting from preparation to in-field to post-processing, here are five tips and tricks I incorporate in my shots!
1. Know The Calendar.
You cannot expose the Milky Way clouds or a starry night sky if you have the moon in sky. Even a quarter of the moon can blow out your shots.
- Bookmark websites that give you sunrise, sunset, moonrise, and moonset times for each day. Note down these timings for the days of your trip.
- Typically, you need to wait an hour after sunset to enter a dark sky period. The sky will start to wash out about 30 minutes before moonrise and 90 minutes before sunrise.
- If a moonrise is occurring after sunset, then work during that window. An hour post sunset and thirty minutes before moonrise should still give you a dark enough sky.
- A new moon night is ideal. That being said, experiment during the period of moonrise/moonset of a waning moon. You could end up with a surreal landscape!
2. Know The Galaxy.
Like all celestial objects, the Milky Way also has changing positions in the sky. I use star-positing apps to track the positions of the Milky Way, planets, and stars.
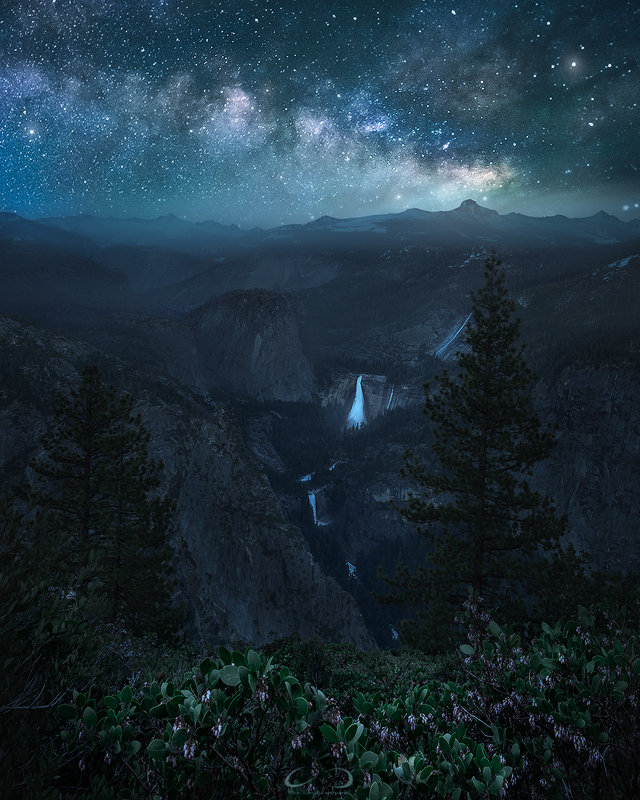
- In the northern hemisphere, the Milky Way is more horizontal during summers. This is an opportunity to get excellent panoramas of the arch over a landscape. During winters, the Milky Way will be more vertical. This setting is wonderful for composing shots where the core seems to rise out of a mountain peak (for example). In the southern hemisphere, it will be the opposite.
- It is also important to note when the core of the Milky Way rises above the horizon or how high the arch will be (when composing shots). For example, in May, the arch will be quite close to the horizon with the core rising around 10:30 pm. However, you need not memorize fine details as a night out is always an adventure and an opportunity to get creative!
- It is worth knowing the general direction of the galaxy. Typically, the arch stretches from south to north (core to tail). Of course, this positioning is not exact for every set of coordinates but works well to give you an idea.
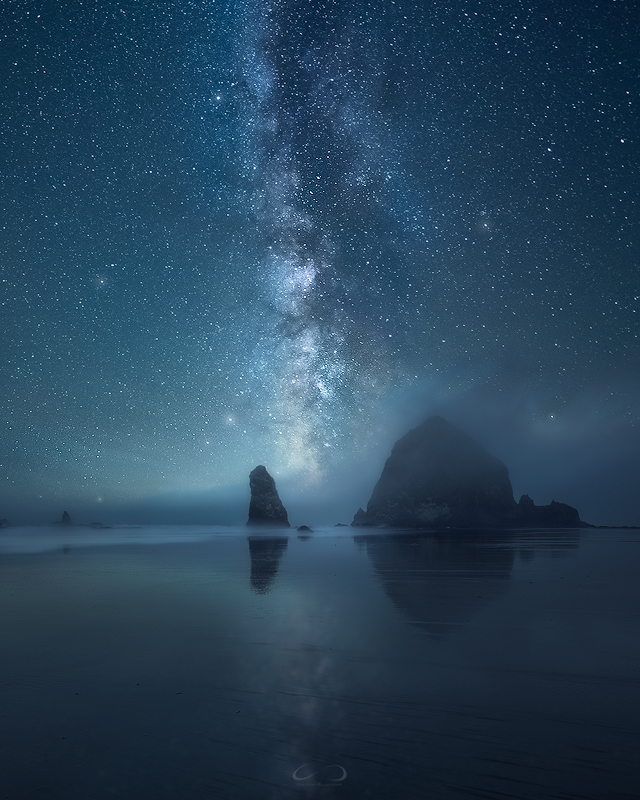
- Generally speaking, the Milky Way core always fascinates the viewer immediately. However, do make a 180 degree turn to admire the tail behind! You will spot another galaxy - Andromeda! Correctly exposed, you will notice the spiral shape of Andromeda in your shots.
3. Know The Locations.
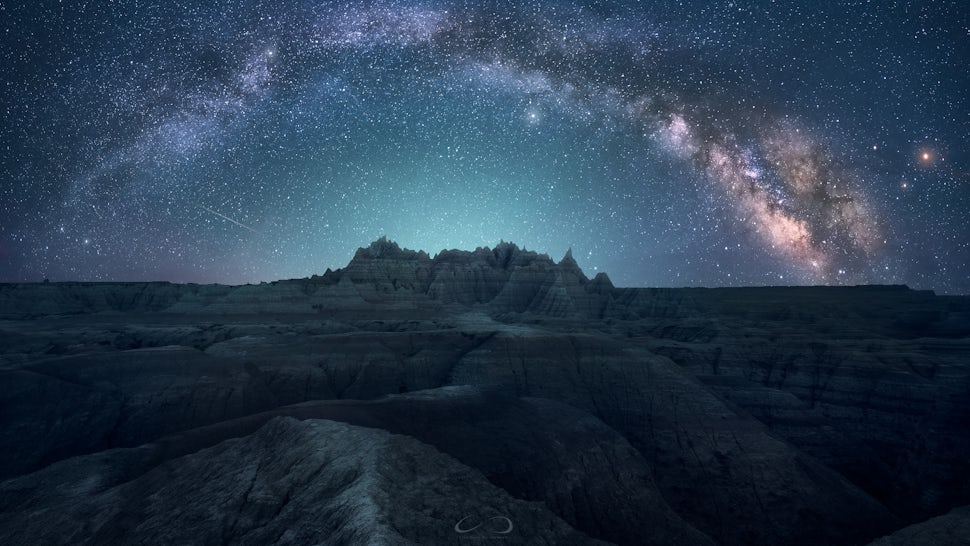
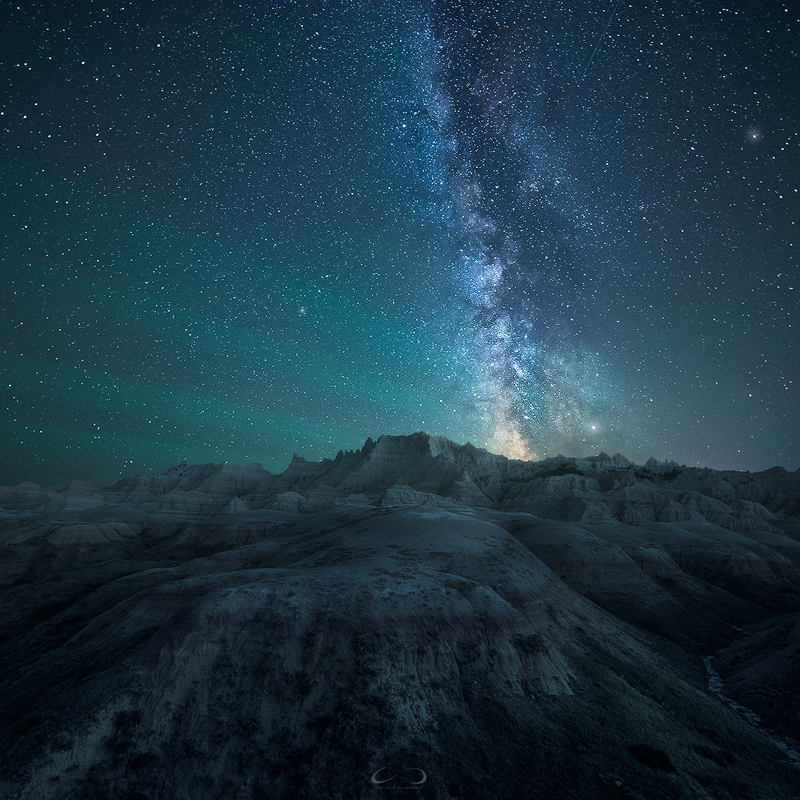
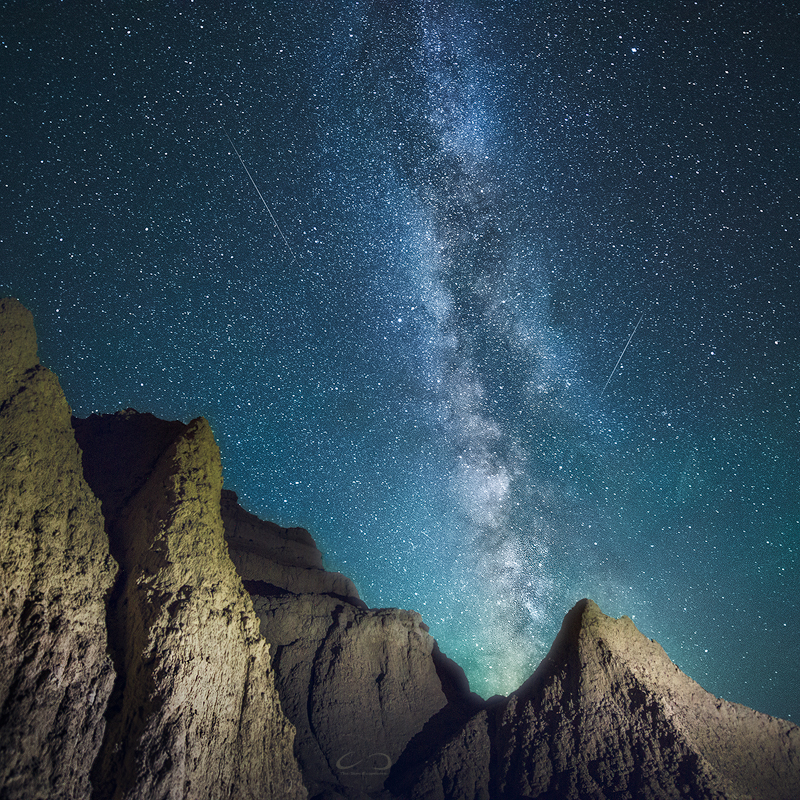
You would do yourself a huge favor if you scouted your compositions ahead of time during the day. Landscapes that may look bleak in daylight could suddenly transform into superb foregrounds for the night sky! A prime example is Badlands National Park.
- Apart from hiking during the day, I actively identify places and features that could make interesting subjects when positioned against the night sky.
- Leading lines never fail! If you come across slopes of a valley, a snaking trail or a curvy shoreline, visualize how those lines and curves could galvanize a nightscape.
- Do some research on the locations you are going to visit. I start off by searching " <location> night sky" on Google to get an idea of what is in store. Beware of falsely-tagged or misleading images! I always open the webpage source of an image to verify it. Additionally, you can search for night exposures of those places on image-sharing portals.
- Weather plays a huge factor! Check the forecasts online. It is always handy to get the local forecast as well. If the day is overcast, look at the hour-by-hour forecast. I have encountered several situations when clouds cleared off at night. Moreover, do not let a few clouds discourage you. Some cloud cover could make for some magical shots!
4. Know The Technique.
If you don't have the right gear or the technique, then you will never capture a night sky in all its glory. Knowing your equipment well is essential. Full frame cameras do a much better job due to their significantly better noise performance. Moreover, cropped sensors will narrow your frame by a factor of x1.5. A 14 mm lens would effectively become 21 mm. Obviously, a reliable tripod is essential.
- General exposure settings: You'd want a wide aperture (f/2.8 is ideal), a short focal length (14-24 mm), and a high ISO between 1600-3200. Typically, I expose the stars between 20 to 30 seconds. There is a rule of thumb you can follow to avoid star trails. Dividing 500 by the focal length will give you the maximum number of seconds you can expose the sky without registering noticeable star movement. Example: At 20 mm, I could shoot up till 25 seconds.
- Light painting: Always carry a flashlight/headlamp! Not only will it help you to ascertain your footing, but you can get quite creative with it in your shots! If your foreground consists of rocks, during your 25s exposure, illuminate them for half a second...and see the result! A couple of things to keep in mind: Side-on light always look better than front-on. It adds more "dimensionality" to the foreground. Secondly, be very judicious with how long you light paint as you risk blowing out parts (if not all) of your foreground.
- Similar to bracketing, I often take two exposures - one for the sky and one for the land. Typically, I will use ISO 3200 for 25 seconds on the Milky Way core to bring out its luminosity. Then, I will expose the foreground at ISO 800 for a minute. It is easier to control the noise in the sky so I can afford a high ISO and hence, I can keep the shutter speed less than 30 seconds to get sharp stars. In contrast, as land is (mostly) stationary, I can have really long exposures and thereby, reduce the noise through a low ISO. If the foreground is lit, you could be more ambitious and consider focus stacking!
- Panoramas can make for some striking night imagery! If you are shooting a low, horizontal Milky Way, consider positioning the foreground subject at the center of the arch and taking a panorama. However, you need to be quick and efficient with your shots as the sky is not stationary! Additionally, I take overlapping shots both above and below the main "panorama area" to ensure no weird compression or stretching. You could go a step further and take two separate panoramas of the sky and the foreground. Although this requires more post-processing effort, the result will be worth it. Alternatively, when the Milky Way is vertical, consider vertical panoramas. They will really make your foreground stand out!
5. Know The Processing.
Processing makes the difference between a good and a great landscape. This is true for night photography as well. Although processing is quite taste and style based, there are certain basics that can be shared.
- I first "pre" post-process my RAW files in Lightroom (LR) where I make basic adjustments to exposure, white balance, and color. Then, on Photoshop (PS), I make targeted adjustments and add finishing touches.
- Lightroom: I process the sky and the foreground separately while maintaining a uniform overall tonality to the image. The easiest way to achieve this is by making a virtual copy. Alternatively, as mentioned before, you can make a longer exposure for the foreground with a lower ISO.
- For the sky, I am more aggressive with the noise reduction slider as you don't lose appreciable detail in the sky. Using an adjustment brush or gradients, you can add clarity and contrast to make your Milky Way pop. I prefer keeping the core slightly warmer than the rest of the sky to bring out its colors. You can push the highlights slider on the stars to have them shine bright. (Be careful to not blow out the Milky Way!)
- For the foreground, I am conservative with noise reduction as a lot of detail can be lost. Often, I will bump the exposure a bit while still maintaining the mood. You can increase the whites in specific areas of interest. You may need to adjust the white balance to stay in harmony with the sky.
- Photoshop: After you have opened your LR-processed image(s) on PS, you can mask the virtual copies into one another. Then, you can make targeted adjustments. The idea is to create a transition from the foreground to the sky and maintain the mood of the night. You do not want everything to be evenly lit up.
- I utilize luminosity masking (you can read about it online). For example, using luminosity masks, I can decrease the saturation of the dark parts of the images without affecting the brighter areas.
- Finishing touches include discrete dodging/burning on a 50% opacity "soft-light" gray layer. This is a non-destructive way to dodge/burn. If I want the effect to be stronger, I change the blending mode to "overlay." While the application may be minimal when compared to a day shot, you can use it specifically to draw the attention of the viewer to your main subject. Finally, some Orton effect can be added (to taste).
- Sharpening: When you display your final image to the world, you need to know the resolution at which it will be displayed. Uploading a 6000x4000 full-size JPEG on the web will result in a softer quality. Think about it - if the image will be viewed mostly on a cellphone, what use is uploading a resolution the screen cannot accommodate! Hence, if you target your sharpening for that resolution, your image will look its best. There are several techniques for web-sharpening you can review online.
I hope I could shed some helpful light on shooting under the stars! Remember, the most important aspect is to enjoy the night. That will also help you construct the image as you feel it. Happy shooting!
Andromeda, Milky Way, and all the celestial wonder make every night out special!

We want to acknowledge and thank the past, present, and future generations of all Native Nations and Indigenous Peoples whose ancestral lands we travel, explore, and play on. Always practice Leave No Trace ethics on your adventures and follow local regulations. Please explore responsibly!
Do you love the outdoors?
Yep, us too. That's why we send you the best local adventures, stories, and expert advice, right to your inbox.


