
10 Hacks For Eating Well And Staying Fueled On Your Next Backpacking Trip
Don't get hangry on the trail.
Figuring out what food to pack backpacking stressed me out when I first started backpacking. What do you eat for lunch? You can’t pack sandwiches and I don't want to take the time to stop and heat something up. What are the right portions? Being a vegetarian complicated things a bit more for me too.
I slowly started figuring out how to eat well on the trail after running out of food, being left only with Clif bars and making myself sick eating too many cheesy freeze-dried meals. Of course backpacking isn’t about the food, but not having enough calories and proper nutrition can slow you down or derail plans.
Each trip I go on I figure out something I can do better for my next trip. I’ve pulled together my top ten here. While most of these tips are helpful regardless of the length of the backpacking trip, they’re most applicable for trips longer than a few days, when weight really starts to matter.

1. Minimum of 100 calories per ounce
There’s really two ways to approach how much food you should be packing—total calories or total weight. Packing food based on the calorie count is more accurate, which is important on longer trips when you don’t want to carry superfluous weight. To get a calorie burn estimate, go out and track your calorie burn while hiking a trail with a similar terrain and length you’ll cover in a day carrying a pack weighted for your trip. For the most accurate result, use a heart rate monitor. If you don’t have one, a GPS tracking app such as Strava will give you an amount, albeit less accurate, since it doesn’t account for the pack weight you’re carrying. I hesitate to call out a calorie burn estimate, but in case you absolutely aren’t able to track yourself, I’ve found that you’ll burn approximately double your normal amount on an average backpacking day (i.e. not strenuous or overly heavy pack).If you go off total weight, there’s a rule of thumb that the average adult consumes between 1.5 and 2 pounds of food per day. But, if you want to avoid potential extra weight and bulk, go the calorie counting route.
So, now that you have the total amount of food you need to bring nailed down, you need to start choosing which foods to bring. My tip is to only pack meals and snacks that collectively weigh more than 100 calories per ounce or 5 calories per gram. There’s 28 grams in an ounce if you’re going to convert. I’ve heard this rule time and time again (The First 40 Miles podcast’s episode 38 for example) and it’s a good one to stick to because it helps weed out meals that aren’t worth their weight.
Bringing a soft bottle of your favorite nut or vegetable oil is a great way to add more calories to lighter calorie “carrier foods” that still have nutritional value such as couscous, tuna or oatmeal. Here’s some of my favorite high calorie per ounce foods that hold up well on the trail: nut butters (try Boggs Trail Butter), Nutella, banana chips, potato chips, corn nuts, dates, dried grated Parmesan cheese (recipe), powdered hummus and mini croissants.
2. Stop at a pot, a long spoon and folding knife
While this tip follows the lightweight backpacking ethos, you will thank me when you only have to haul around, clean and pack a pot and spoon. Yes, you are limited in what you can make, but honestly, when you’re putting in long days on the trail, time consuming food preparation isn’t a priority. Stick to easy to make meals that require soaking or rehydrating with water.The part about bringing a long spoon is actually an important one. If you’ve tried to get a spoon into crevasses of a food packet while trying not to burn your fingers in the boiling water, you understand this point. I like the Sea to Summit Alpha Light Spoon Long. You will want a small foldable knife to cut food and open packages with such as an Opinel knife. Ultralight backpackers bring a razor blade to cut down on weight instead.
3. Cook with freezer storage bags
To avoid dirtying your pot, you can cook and eat out of a freezer Ziplock bag. This method works for foods that just need to be heated so they can absorb water or dissolve in water such as oatmeal, dehydrated soups, soup mixes, and mashed potatoes. Just put the necessary boiling water in the bag with the food. You can also cook food in the bag in boiling water—many people cook eggs this way. Some might see freezer bag cooking as wasteful and I get it, but this method uses less of what could be, your precious water reserve, and eliminates leaving all the little food bits on the ground after cleaning the pot, which attracts wildlife. Plus, if you make the same meal more than once, just reuse the bag.

4. Eat on the trail
It’s not a seamless metaphor, but when you’re backpacking you kind of want to eat like a toddler. Meaning you should be eating often and no one will judge you if you have crunched up potato chips in one hand and half a banana in the other while trekking along. Forget the concept of saving yourself for a sit down lunch at some prescribed time or being confined to eating breakfast and dinner wherever you put your tent up is flawed.
Some benefits of eating on the trail versus at camp:
Minimizes energy slumps. Your body is getting fuel while it’s burning it, so you’re less likely to have big slumps in energy before you get your meal in, as well as afterward when you’re tired body is working on digesting the food.
You sleep better. Eating most of your calories right before you sleep means your body is busy digesting while it should be resting.
Get more time on the trail. You can start your hike earlier, say right before sunrise, and stay on the trail until around sunset. This means you catch more of those magical light times while out on the trail, not futzing with your stove in your tent.
Pick your view. The ideal, available, or assigned backcountry campsite is not always going to have a nice view. Don’t limit you breakfast and dinner time to your tent site! All those awesome viewpoints that you stop and photograph anyway could be paired with a nice cup of coffee or a yummy dinner.
Disperses food smells. It keeps more of the cooking away from your tent and/or established backcountry camping areas, which helps deter bears and wildlife from roaming around there.
5. Drink mixes
Every time I go backpacking I crave two drinks (besides beer) without fail: lemonade and hot chocolate with little marshmallows. It makes sense—my body is craving sugar and water. Staying properly fueled and satiated doesn’t stop with your food.
Bringing along drink mixes, such as lemonade, Nuun tablets, protein powders and hot chocolate can help you get the nutrients and fuel you need, while also helping to make sure you’re getting enough hydration. Another benefit of drink mixes is to cover up any slightly funky taste in the water.
6. Branch out from freeze dried
Buying freeze dried meals is easy given the multitude of options available and the fact that they’re light. However, they’re expensive and are hard on your stomach day after day. Branch out and try making your own meals using quick cook carbs and dehydrated fruit or vegetables that you can buy in bulk.
Then add flavor with dried spices, chilies and curries combined with powdered “fats,” such as peanut butter, coconut milk and parmesan cheese. A recipe I like is rice noodles mixed with water, powdered coconut milk, powdered peanut butter, ground chili, garlic salt and some coconut sugar for a peanut sauce. Throw in some avocado oil for extra fat. You don’t need to be fancy, the simpler the better for your digestion.

7. Bring a few indulgences
While it’s definitely important to keep your pack as light as possible, most backpacking trips are still about enjoying yourself so don’t deprive yourself too much. Bring one or two items that will make your trip a bit better if you have them, despite the weight or bulk (within reason of course). Some of my favorites to bring are a flask of scotch, tequila and some limes, or ground coffee and a French press add-on to my pot.
8. Ditch the single-serve packaging
When packing your food, try to minimize as much of the packaging as possible. This not only reduces weight and waste hanging around in your pack, but it also allows you to have more control of your portions. To keep track of what a portion and the corresponding calories are, just write it with a sharpie on the bag. Same goes with the amount of water needed or any other instructions for the meals you make and pre-package.For all of your liquidy foods such as peanut butter and oils, use Platypus soft bottles.
9. Don’t sip from a water bladder
Sipping water out of a water bladder tucked away in your pack seems like a fool proof way to keep hydrated. However, you can’t keep tabs on how much you’re drinking and how much you have left in the bladder. This could mean you don’t stop frequently enough to fill up at water sources or you’re off track with your hydration and you don’t know it.
I recommend keeping a hydration bag in you pack as your water reserve, with the size depending on how often there will be water sources along the trail, and keep a clear water bottle outside of your pack. An additional benefit of this set up is that you can pop electrolyte or drink mixes into your bottle and not contaminate your other water. I like MSR Dromlite bags because the MSR water filters snap right into the nozzle and it has three opening sizes.
10. Leave it cleaner than you found it
Be a leave no trace leader. There’re a lot more people venturing into the backcountry than ever before. Given the bits of trash and food I see left around on trails and campsites, I don’t think it’s good enough to simply practice leave no trace for yourself any longer. I encourage you to leave it better than you found it by not only thoroughly cleaning up your food, but also grabbing other trash you see. It benefits us all to be trail stewards, because it means that there is less threat to bear safety and less critters roaming around backcountry campsites.
The other element of leave no trace is keeping the water clean, and I think this can be an afterthought for newer backpackers. Only use biodegradable soap when you need it and make sure you are at least 200 feet away from any water source when you clean your dishware out. This goes without saying, but this rule should also be followed for when you go to the bathroom or when you bathe yourself or rinse your clothes etc. Also, I know it takes some fun out of hopping into that pristine lake, but it’s a good idea to just quickly rinse off before going in. When you get in that water, all of the bug spray and sunscreen you loaded on is getting rinsed off—for someone to then come along and stick their water filter into.
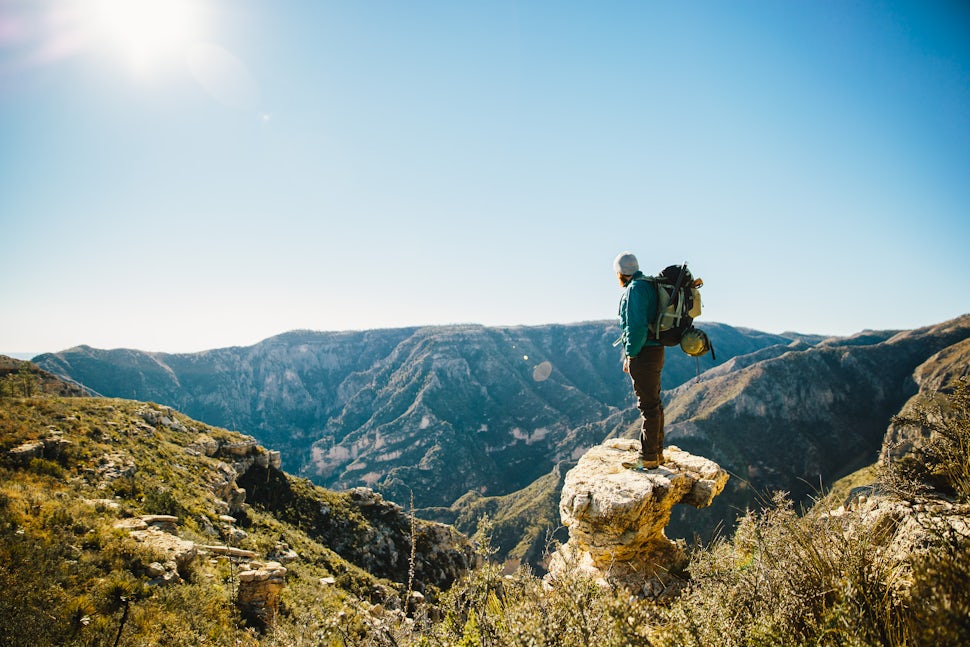
Cover photo: Andrew Miller
Don't see your favorite adventure on The Outbound? Show us by creating an adventure.
Please respect the places you find on The Outbound.
Always practice Leave No Trace ethics on your adventures. Be aware of local regulations and don't damage these amazing places for the sake of a photograph. Learn More
We want to acknowledge and thank the past, present, and future generations of all Native Nations and Indigenous Peoples whose ancestral lands we travel, explore, and play on. Always practice Leave No Trace ethics on your adventures and follow local regulations. Please explore responsibly!
Do you love the outdoors?
Yep, us too. That's why we send you the best local adventures, stories, and expert advice, right to your inbox.


