
Why The Narrows Is Best Done Overnight From Top To Bottom
Put in a little extra effort and find solitude in Zion.
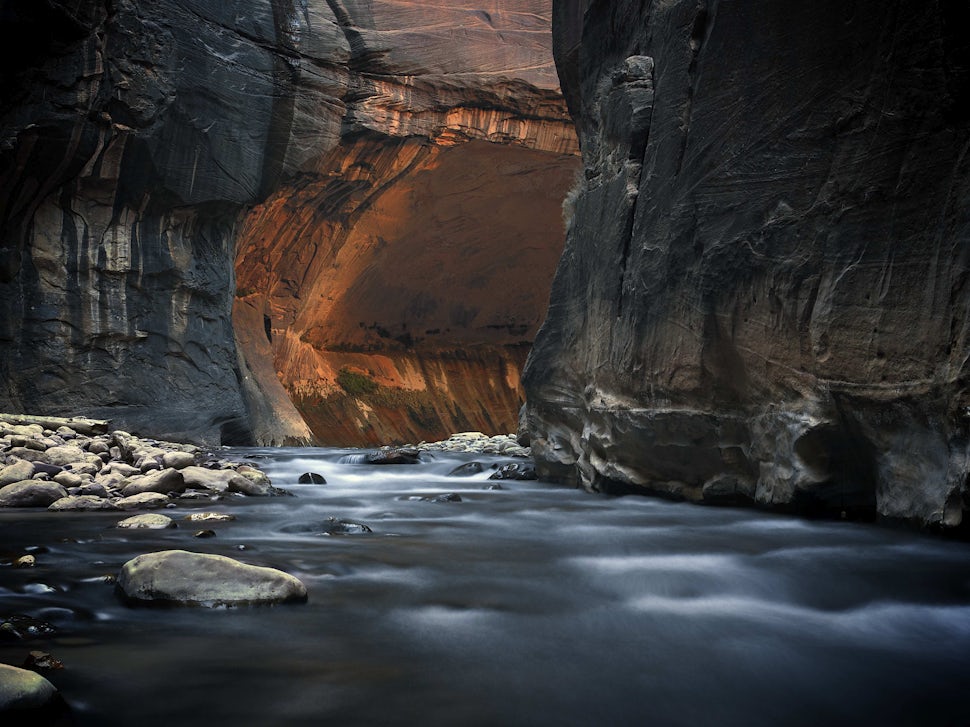
There's a lot of chatter about the bottom of the Narrows being the best, but the top has my heart. For anyone who really wants to experience the narrows I suggest putting in one extra day and making the trip an overnighter. If you are like me, any national park can be a tad bathetic due to the flocks of tourists. Even the grandest of views can be ruined by the hustle bustle of hundreds of people. For a tad bit of solidarity whilst frolicking in Zion, spend a night in the narrows. Bonus…seeing more of the Virgin River's fine art. Don’t discredit her, the top is just as gorgeous, if not more, then that which they have deemed “wall street.”
You can do the 16 mile hike from the top down in one day (for which you also need a permit). However, I stand by the belief that if you are going to do it, take the time to actually reel it all in nice and slowly. It took the lovely Virgin a few million years to create this masterpiece, do find 48 hours to give it the look it deserves, and spend a peaceful night in her bosom.
My brother and I spent our first annual sibling backpacking trip in Zion. Due to late planning we missed out on nailing down a permit ahead of time. Not discouraged, we took our chances at grabbing one of the walk-in permits upon arrival at the park. There’s a lot of info that can be a bit overwhelming as you plan your getaway to Zion and the overload of info continues once you are there. We were told upon arrival, from the nice ranger at the visitors center, that the bottom of the narrows “is the best part anyways…there’s no reason to bother with the top.” Lucky us, we ignored him. Here’s some advice I wish he would have given us instead of discouraging us.

Photo: Rickey Minder
1. Grab Your Permit Beforehand
For overnighting it, you either book a permit in advance or can grab a “walk in” permit at the visitors center the day before. If you can, plan ahead and book online. Permits are open for 3 consecutive months and the newest month opens on the 5th of each month. If you can’t plan ahead, don’t stress. Half the sites are saved for walk in’s. It just requires jumping into line the day before you plan to push off to snag a permit. The desk opens at 7 (except Oct-Apr, 8am). I was in line by 6 am, and was the third person there. I would recommend getting there an hour before, save yourself the stress of showing up to a line of people. We woke up at 5:30 and my brother packed up camp, then brought me coffee and breakfast as I waited…tag team it. As a general note pertaining to Zion, the sunrise is your friend. I always say beat the sun up, beat the heat, beat the crowds.
2. Know Your Gear, Know Your Limitations
You can rent anything one could dream up from a rental company in Springdale. And there is a lot of advice to do so. At $7 a walking stick, rental companies are banking off of it. Of course the National Park service advises and scares you to death about every slippery rock and crushed toe…but keep in mind they’ve made way too many rescues due to people not knowing their limits. My advice to you is this. If you are stressed because you aren’t prepared, you’ll miss the scenery. Know your body and prep accordingly. I hiked the top down in a combination of my chacos and my tennis shoes. I wore a neoprene sock towards the top where the water was a bit colder. I found a stick mother nature had kicked to the ground, and it was nice to have on some of the deeper crossings. My brother had rolled his ankle the week before, had a good wrap about it and conquered the journey with the same combo as myself. I don’t personally think you NEED to drop a bunch of money on rentals, but again, be safe and know your personal limitations. If you don’t have great balance and feel unsteady in water crossings, stock up on appropriate gear. You’ll need your typical overnight backpacking gear, pertaining to your desired experience. When you pick up your permit, you’ll be given a bag in which to poop in, should the matter arise. The parks got this down to a science. Please, use the bag. You can purify, and I do stress, purify, straight out of the Virgin River herself. I highly recommend taking some time on your way out the second day to purify water out of Big Springs which is just below campsite 12. Yum. There was only one crossing where I had to hold my bag over my head and given no falls, my gear stayed dry. However, make peace with the fact that you will be wet and you are spending the majority of your hike in water. No one likes wet gear when you are ready to jump into bed at night. Prep accordingly. Dry bags, zip locks, your call. I kept my sleeping bag & change of clothes up near the top of my pack the first day, just incase.
3. Let Someone Else Do The Driving
The trailhead at the top begins at Chamberlains Ranch, which is an hour and a half drive from Temple of Siniwava. Book the earliest shuttle possible. Most shuttles will pick you up in the parking lot by the visitors center. You can grab business cards from the visitors desk or a simple google search will do the same. I suggest waiting to book a shuttle until you have your permit, especially if you are doing a walk in permit. We did call around and found most the prices to be within $5-$10 of each other. Pick your drivers brain. Our driver had been taking backpackers up this same route for 10 plus years. She’d seen and heard it all. If they are willing to share, you’re sure to have a few laughs and learn from others mistakes. It is possible to do the shuttling yourself if you are with a group that has two cars. However, the time that it will take you to pick up your car at Chamberlains afterwards is worth the money you’ll spend on a shuttle. Fast forward to the end of your trip as you exit the narrows. The shuttle system at the park has buses headed up and down the canyon all day long. You will simply grab one of these to get back to wherever it is you plan to spend your next night.
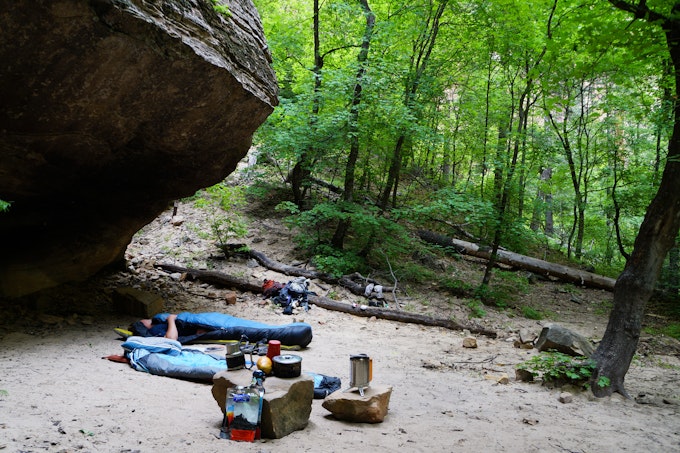
Photo: Rickey Minder
4. There Are No Bad Campsites
There are 12 sites from which to choose from. The size of your group will guide you in the direction of which site to choose. There are only 2 sites that accommodate groups larger then 6. We had our eye on 8 because we wanted something about halfway down and had read it was the bees knees, which it was. Sites 1,3,5,7,9 & 12 are the only sites available for pre book, the rest are held for walk in permits. A side note on camping, we set up our base camp between overnight trips in the area at Watchman. Also available to book ahead of time per the reservations system.
5. The Serious Part
Become well versed on signs to watch for that indicate a flash flood is heading your way. Flash floods do happen, they are not a fable and people have died. Don’t let this detour you from missing this beautiful place, DO use it as inspiration to know what you are doing. Check the weather, but keep in mind, mother nature doesn’t always keep her promises. Permits are not issued if the flow is 120cfs or greater, but just because a permit is handed to you doesn’t mean the weather can’t change. Take your time walking through the water. This is one of the reasons I recommend overnighting. One of the quickest ways to roll an ankle is hurrying along through the water to make the 16 mile stretch before sundown. The group we shared our shuttle with bolted out of Chamberlains Ranch before we got our packs out of the van because they were in a hurry with a day permit. Not my idea of taking in the scenery.
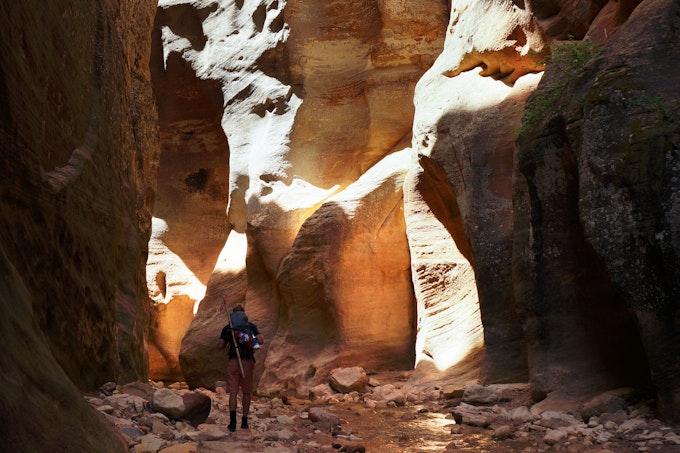
Photo: Rickey Minder
6. Take A Look Up Orderville Canyon
As we approached the bottom of the narrows you’ll start to see day trippers from the bottom seep up towards you. The reality that we were headed back into the beating heart of a bustling national park made me want to run back up stream. Take the time to explore up Orderville Canyon, which comes in from the east just after you make it through the “wall street” of the narrows. We dropped our packs (use your own judgement) and spent a few hours enjoying a moment or two of further solidarity. Well worth the detour.
Cover photo: Stephen Marshall
We want to acknowledge and thank the past, present, and future generations of all Native Nations and Indigenous Peoples whose ancestral lands we travel, explore, and play on. Always practice Leave No Trace ethics on your adventures and follow local regulations. Please explore responsibly!
Do you love the outdoors?
Yep, us too. That's why we send you the best local adventures, stories, and expert advice, right to your inbox.


