
Using Lightroom to Perfect Your Outdoor Photos
With all our time indoors, now is a great opportunity to hone your editing skills. In this introduction to Adobe Lightroom, learn about the best editing tools for outdoor photographers.
In our current situation, outdoor adventures have taken a backseat as we work together to flatten the curve of COVID-19. If you are like me, you’re longing to get back out there. With that I was thinking of what else I can do during this time indoors to keep my creativity and outdoor passions engaged. As an aspiring photographer I have been using this time to focus on editing my landscape shots. This is a great opportunity to hone the editing skills that can make your nature photography stand out. With that I thought I’d share an introduction to a few of my favorite tools in Lightroom to get the most of your outdoor photography.
For this article I’m going to be discussing tools and techniques in the program Adobe Lightroom. While this is focused on Lightroom, many of the different photo editing apps out there have similar tools that you can use to achieve similar effects. You can also use download the free Lightroom mobile app and use many of these functions directly on your phone. Another quick note. To get the most out of this editing process, you’ll want to shoot your photos in RAW, rather than JPEG in camera. By shooting in RAW you’ll be able to recover much more of the details from your photos in post processing.
Basic Tool
The Basic adjustments in Lightroom is the best tool to start with and gives you a ton of control to improve your final image. Items like Exposure, Highlights and Shadows can help adjust for any blown out or under exposed areas of your photo. You can also adjust the white balance by moving the temperature slider if your white balance in camera was too cold or too warm. Dehaze helps reduce some of the unnecessary haze depending on the conditions when you were outside. Vibrance and saturation will bring more bring out your colors.

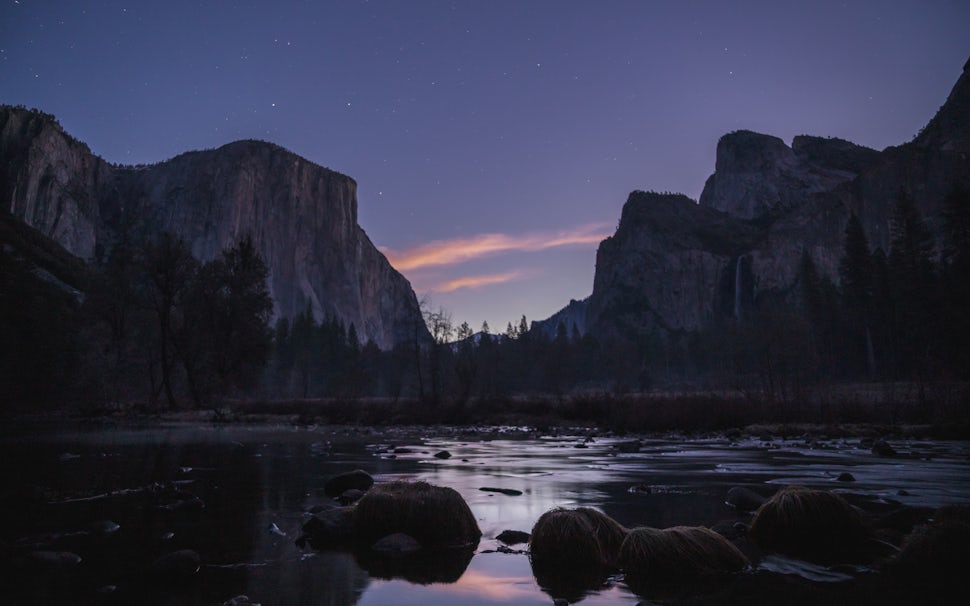
Take a look at these side by side from Tunnel View in Yosemite National Park. The first is the RAW image directly out of my camera. The second is after I did basic adjustments to increase the overall exposure, boost the shadows and decrease the highlights. I also did some slight dehazing. This gets so more detail back and gives the viewer the ability to see more of the image. You can “save” an image that otherwise might look unusable. I tend to slightly underexpose my shots in the field since it’s much easier to bring additional detail back to shadowed areas than to blown out highlights.

HSL/Color
Another of my favorite tools in Lightroom is the HSL/Color tool. This controls three elements of specific colors in your photo.
Hue: lets you adjust the actual color itself. If you want the reds in your photo to be more orange or more purple, you can simply drag it towards that end of the slider.
Saturation: this impacts the richness of your colors. The more saturated the color is the more vibrant they will be, however I’d recommend being very cautious here. Over saturated photos don’t look natural and can distract from the overall image.
Luminance: Changes how bright or dark your colors are. If you want a deeper blue in the sky or ocean, consider decreasing the luminance of blues in the image.

I find HSL/Color to be such a wonderful tool because it helps you edit your image to more accurately capture what you saw in the landscape at the time. It can also help you emphasize certain aspects of a shot, like the fading pinks of a sunset or the greens of a lush forest. When it comes to how to use this tool, there is no “right” answer. Every photographer has a different style and likes to do different things with their colors. For instance, I prefer more muted blues and I like rich greens and oranges. Take a look again a side by side of the same image of Tunnel View after I’ve applied my HSL/Color adjustments. I’ve pulled some of the blues down in the sky and changed the color of the light on El Cap.


Tone Cure
The Tone Curve tool is hands down my favorite in Lightroom. This gives you the ability to adjust the relationships between Highlights, Midtones and Shadows in your image. Depending on the conditions at the time, you can use tone curve to brighten dark areas or bring out highlights. You can also add contrast to an image by using an S curve format. This brings up highlights and increases shadows. Lots of individual tweaking to do here to suit your individual style but you can get some great looking images through this tool.

You can see here by looking at this side by side how the Tone Curve makes the photo more dynamic. It takes out the flatness of the tones and gives more contrast which I think makes a photo pop.


This is just the surface of what you can do with Lightroom. There are many great tutorials on YouTube that I would recommend checking out to get a more detailed overview of all the different tools in the program. I hope this article can be an intro into some of the great ways you get the most out of your outdoor photography through some simple editing techniques.
Stay safe and indoors for now friends! See you all on the trail soon.
We want to acknowledge and thank the past, present, and future generations of all Native Nations and Indigenous Peoples whose ancestral lands we travel, explore, and play on. Always practice Leave No Trace ethics on your adventures and follow local regulations. Please explore responsibly!
Do you love the outdoors?
Yep, us too. That's why we send you the best local adventures, stories, and expert advice, right to your inbox.


