
Key Tips for Backpacking Meals And Food Dehydration
Nutrition in the backcountry is, by far, one of the most challenging parts of being on trail for me, especially when I am doing big mile days and carrying a heavy pack for days on end.
Nutrition in the backcountry is, by far, one of the most challenging parts of being on trail for me, especially when I am doing big mile days and carrying a heavy pack for days on end. I need about 3,000 calories per day to feel energized and strong and not be calorie depleted. I want to move fast and think fast on the spot, and when my body and brain are in starvation mode, I find myself slowing down and experiencing “brain fog.” Speaking of “brain fog,” I am actually in the middle of writing a book with a big publishing company about brain fog!
My dog, Moo, and I are setting out to hike 130 miles in the Eastern Sierra over 10-12 days beginning September 4th. I decided to make all of my food for this once in a lifetime trip. I have wanted to do a long multi-day thru-hike with my dog, and it seems that everything aligned perfectly for us this summer. I decided to make all of my dehydrated meals mainly because I have more control over the calorie count, what I am putting into my body and the sodium intake.
For the last several years, I have been relatively complacent about eating store-bought dehydrated backpacking meals from a slew of different companies. Although the food is not terrible, I became tired of waking up like a pumpkin each morning from all of the sodium content. It became too much, and my body could no longer handle it. I know many people who choose to cook and dehydrate their food simply because it does save money.
My primary reason was health. The cost to purchase a food dehydrator, a scale, zip lock bags, and the silica gel packets plus the food cost is probably more than you would spend buying packaged dehydrated food from Backacker’s Pantry or another great brand. However, over time, you will save money, and I am looking forward to reaping the financial benefits next summer. Besides money, cooking, preparing, and dehydrating your food takes a tremendous amount of time, effort, and research. I call this a true labor of love. I spent weeks preparing food for both my dog and me for 14 nights on the trail, which will include my long 130 miler plus a couple of extra trips I have planned when I return home to Mammoth.
Items you will need
- Parchment paper
- Kitchen scale
- Ziplock bags
- Bentoryte re-usable silicone bag (for rehydrating in the backcountry, works GREAT as an oven and face wash sink)
- Silica gel packets dehumidifiers (these are re-usable)
- Dehydrator
Types of dehydrators
There are two main types of food dehydrators: vertical and horizontal flow
Vertical flow dehydrators (the one I borrowed from my gracious neighbor), are also called stackable dehydrators. The heat source is at the bottom, and the circular shelves stack on top of one another. These are the most economical and probably the most popular; however, I had two main issues with this type. The fan is located at the bottom of the unit that moves the air upwards, and therefore the heat is not spread uniformly. Also, if I wanted to check on the circular bottom shelf, I had to remove every shelf above it.
Horizontal flow food dehydrators are more commonly known as shelf food dehydrators, as the shelves pull out individually. They function somewhat like a conventional oven, having a heating source at the back of the unit. They are pricier than the stackable food dehydrators, but the thing about them is, they provide uniform heating (this is key). The one I am eyeing is the Excalibur brand. It is a horizontal flow unit with temperature control and a timer, and yes, it is expensive.

How long does it take?
The research I found stated that it takes about 8-16 hours to dehydrate food. However, I found that my food was not completely dry until 18-24 hours. This discrepancy may have been due to the heat source and lack of temperature control.
Temperature
In general, food dehydrators heat to about 100-120. The circular dehydrators are not temperature controlled; however, the vertical Excalibur dehydrators are, and I believe this will save time and energy in the long run.
Tofu (protein)
I am not a huge meat eater, so tofu is a huge staple for me as it is packed with protein. The key to dehydrating tofu is to freeze it first, let it defrost, cook, slice in very thin strips, then dehydrate for approximately 8-12 hours. The keyword here is “freeze.” By freezing the tofu first, you open up the air spaces by expanding the frozen liquid inside, which allows it to rehydrate better. If you skip this step, your tofu will likely come out of the dehydrator as a solid rock and will be exceptionally difficult to rehydrate.
I made three different tofu batches: Indian curry tofu, Mexican tofu, and Thai curry tofu by combining different spices to bring out certain flavors. I browned my tofu in a pan in fat-free chicken broth as you always want to stay away from oil and other ingredients high that are high in fat because fat goes rancid very quickly.

Veggies
To cook or not to cook? There are many different schools of thought about whether you should cook your veggies before you dehydrate them or throw them in the dehydrator raw. Regardless of what you decide, you want to slice your veggies very thin, so they dehydrate and rehydrate much faster without having a leathery texture. I chose to cook my veggies, as I wanted to season them for taste and add chicken broth for extra caloriesI used a combination of onions, carrots, bell peppers, jalapenos, mushrooms, squash, and zucchini and cooked them together in a pan with fat-free chicken broth seasonings. I mixed them all while cooking and dehydrated them for about eight hours or so.
Shredded chicken (protein)
All of the research, I came across suggested that it is best to use canned chicken (which is pressure-cooked) when dehydrating chicken, mainly because it doesn’t come out as tough dry chicken after you rehydrate it. Pressure-cooked chicken and ground chicken are also other options that will not turn your chicken leathery upon rehydrating it.
It is essential to buy very lean chicken (and any meat) as fat foes rancid. Blot off any oil throughout the drying process.
I only had frozen chicken breasts, so I decided to marinate my chicken overnight and slow cook in the oven before shredding. I seasoned my shredded chicken with taco seasoning and dehydrated it for approximately 18-20 hours, or until dried. Remember that every dehydrator is different, so the times vary, but the key is to make sure the food is totally dry and there is no moisture leftover. Otherwise, it will go rancid.
Ground beef (protein)
I don’t eat red meat. My mom never cooked it growing up, so it is entirely foreign to me. I have no idea what constitutes good red meat or how to coo red meat, but I had to learn, as I decided to dehydrate all of my dog’s trail food to save weight. I saved POUNDS by doing this. My neighbor recommended a very lean, grass-fed ground beef from Grocery Outlet, which I bought. I mixed the ground beef with breadcrumbs, as breadcrumbs are the secret trick to rehydrating ground beef, so it doesn’t taste like gravel. Breadcrumbs allow more liquid to penetrate the dried meat when you rehydrate it, so it turns out tender every time. I mixed the ground meat with breadcrumbs, browned it in a pan, and dehydrated it overnight until the meat was thoroughly dried.
Use only lean or extra lean ground beef with fat content in the 7% to 15% range.
Rice (carbohydrate)
I love carbs, so being on trail without rice would be sad. I made three different types of rice: Spanish rice, Indian curried rice, and Thai curry rice. I cooked the rice in fat-free chicken broth for extra calories and flavor and dehydrated it for about eight hours or completely dry.
Lentils (protein)
I am not a huge fan of eating legumes or beans out of the can. I choose to buy them dried in bulk, soak them overnight and boil them with garlic, spices, a bell pepper, jalapeno, and onion. I added fat-free chicken broth for extra flavor and calories (do you see the trend here). I dehydrated my lentils for about 10 hours. Lentils are a great source of protein and fiber.
Chili
I usually make my vegan chili with beans and soyrizo, but I was in a pinch for time and money and decided to dehydrate Amy’s vegan chili from the can. I separated two cans of chili on parchment paper and dehydrated it for about 12 hours. It was enough for two full dinners, as the dried chili weighed 300 grams total.
Hummus
My friend Summer inspired me to dehydrate hummus. I like to add hummus, chips, and olive oil to my tuna packets for lunch. I make my hummus from scratch regularly (it is easy and cheap), but I went extra light on the olive oil since it will go rancid. Once I made my hummus, I dehydrated it on parchment paper for about eight hours, then put it in my food processor until it was blended into tiny flakes. You must blend hummus and mashed potatoes into flakes! When rehydrating, all you need to do is add a tiny bit of water, and there you have it, homemade hummus in the backcountry!
Mashed Potatoes with turkey bacon
I made my own mashed potatoes from scratch using fat-free chicken broth. Remember, no butter or milk as it will go rancid. I added lots of garlic, salt, and pepper and dehydrating the mashed potatoes for about 16 hours. I cooked fat-free turkey bacon and dehydrated this also. Once the potatoes were dried into sheets and the turkey bacon turned to jerky, I threw everything in a food processor until it was blended into flakes. Mashed potatoes and turkey bacon make for a great breakfast in the backcountry. You can also purchase instant mashed potatoes from Idaho potatoes (they are delicious and vegan) to save time.
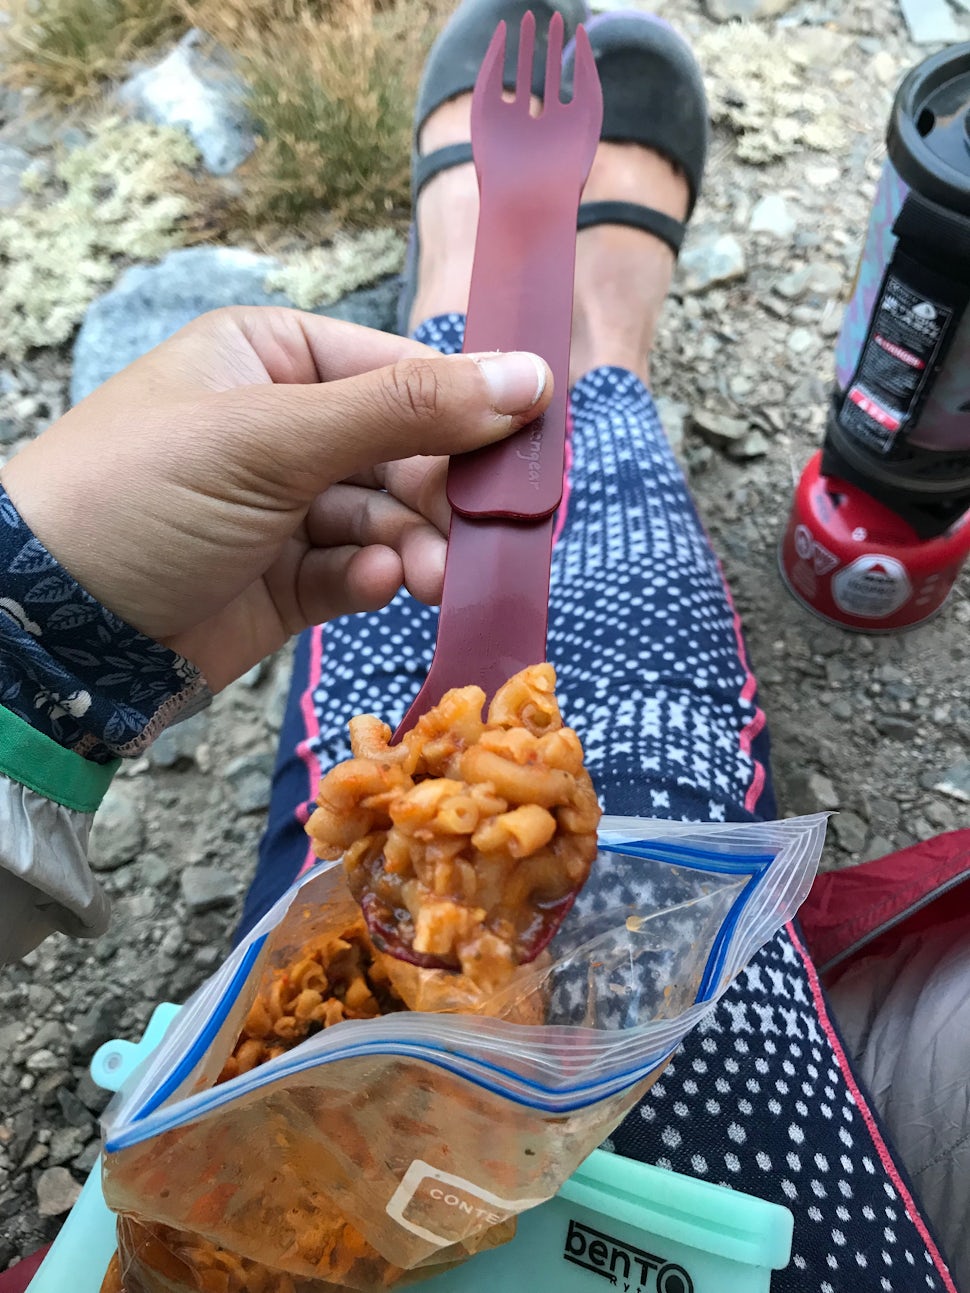
Pasta with red sauce
I make a homemade marinara sauce regularly and always have a large supply stored in my freezer. I happened to have a container of red sauce over elbow macaroni noodles and figured this could be easy to dehydrate. The research states that you should dehydrate your sauce separately into a “bark,” but I decided to experiment, and I am glad I did. The pasta and sauce together came out delicious when rehydrated. I would recommend using elbow macaroni because it is smaller and much easier to rehydrate without getting mushy.
Counting calories
My dog Moo should consume about 400-450 calories on trail each day. Most dogs need about 20-30 calories per pound each day to maintain their weight. Little Moo weighs 13-14 pounds. Each of her wet food packages is about 110 calories, and for her size, she should eat about 3.5 each day. Each of those containers weighs 3.5 ounces, so three of those containers for 10-12 days…well, you do the math. It is approximately 10 pounds of food, plus her treats, plus her peanut butter. This was not happening. Two pounds of ground beef dehydrated weighs 410 grams, which came to 40 grams per day. 1 gram = 0.03 ounces. Two pounds of ground meat equals 2720 calories; divided by ten days is 272 calories each day. One of her treats is 100 calories, with peanut butter, 200 calories. So with 40 grams of dehydrated ground meat and one treat with peanut, we have reached her caloric intake for the day, with minimal trail weight.
I will most likely give her 2-3 treats per day with peanut butter, as her caloric intake on trail is higher than if she is sitting on the couch at home. If I am going to make sure I am consuming enough calories, I better be damn sure my dog is also consuming enough calories each day.
Let’s talk about ME!
If I am doing big miles each day for multiple days, I need to consume 3,000 calories each day to function properly. Below is my daily caloric intake on the trail:
- Trail dinners: 1,500 calories
- Chocolate: 800 calories
- Trail mix: 200 calories
- Electrolyte: 100 calories
- Gummy worms: 100 calories
- Tuna, hummus and chips for lunch: 200 calories
- Olive oil in tuna for lunch and dehydrated dinners: 100 calories
- Breakfast (bars, oatmeal or mashed potatoes): 150 calories
To be clear, in real life at home, I never count calories. I do not believe in counting calories, going on special diets, or “watching what I eat.” I eat full balanced meals, indulge in too much chocolate, and drink plenty of water, coffee, and wine. I also am very active, so I don’t think twice about my home eating routines. I count calories on trail to ensure that I am not calorie depleted, which can be detrimental for days on end.

Weighing, sorting, packaging and rehydrating
I used giant freezer bags to store my potatoes, rice, tofu, chicken, chili, ground beef, veggies, hummus, and pasta separately. Once everything was dehydrated, I then weighed each ingredient individually and mixed veggies, carbs, and protein into a smaller freezer bag, threw in a silica gel dehumidifier bag, sucked out the air, and sealed it tight. Some blogs recommend vacuum sealing as your food can last up to a year this way. However, that is just another gadget I do not want to buy.
It is recommended that a 100-gram meal is usually sufficiently filling for an average hiker, and 150 g is satisfying for a large or very hungry hiker. I chose to measure my portion sizes at 150 g because I plan to do big miles every day, and I wanted the calories. Aim for a ratio of ⅓ protein, ⅓ starch, and ⅓ sauce/vegetables, etc. for about 100-150 grams.
In terms of rehydrating, I generally boil two cups of water for each meal and slowly pour it in. Usually, two cups does the trick, but sometimes I only need 1.5 cups, and I would rather add more later than for my meal to turn into soup. Since Moo is eating 40 g of dried ground beef, I will probably pour 1.5 cups into mine and about ½ cup into her meal if I need to boil more water that is easy!
Tips and tricks
- Bentoryte silicone bags: I know I mentioned this before, but the silicone bags work wonder in the backcountry. I bring one for my long trips and re-use to cook in and sink to wash my face. It helps reduce waste and holds heat very well. If I choose to cook my meal in a freezer zip lock bag, I will place the zip lock bag into the silicone bag as an “oven” to prevent heat loss during the rehydrating process (which usually takes about 30 minutes).
- Silica gel dehumidifiers: these are reusable, and they prevent your food from going rancid
- Nalgene travel kit: Nalgene not only makes excellent reusable water bottles, but they also make the best travel-sized containers. They never leak and are heavy-duty but still lightweight. I will be using these for olive oil, toothpaste, face wash, sunscreen, laundry soap, and peanut butter for this trip.
We want to acknowledge and thank the past, present, and future generations of all Native Nations and Indigenous Peoples whose ancestral lands we travel, explore, and play on. Always practice Leave No Trace ethics on your adventures and follow local regulations. Please explore responsibly!
Do you love the outdoors?
Yep, us too. That's why we send you the best local adventures, stories, and expert advice, right to your inbox.


