
7 Essential Tips for Long Exposure Photography
Using the below tips will help you capture a one of a kind image to showcase your next adventure.
1. Something Moving
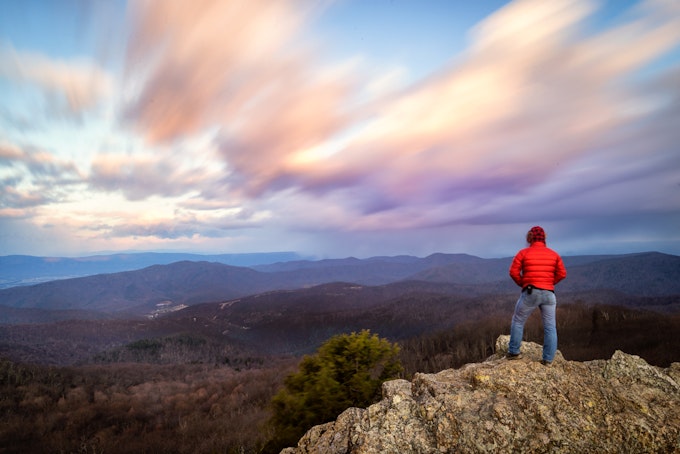
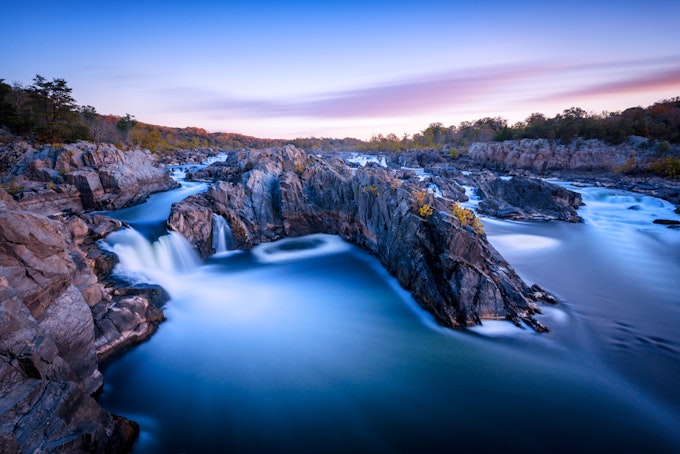
For a long exposure photograph to be successful, there must be movement in the scene you are capturing. One of the most common uses of long exposure is to show water moving over a waterfall or down a stream, but any movement that conveys the passage of time will work for long exposer photography. A few other example are clouds moving in the sky, vehicle lights driving on a road, people walking, oceans waves, star trails, etc. As long as there is movement, long exposer can make an average image into an outstanding, one of a kind image.
2. Use a Tripod
Long exposer photography requires slow shutter speed, and the camera has to be completely still while the shutter is open. The best way to ensure there is no movement is through the use of a sturdy tripod. If there is any movement or camera shake during the exposure, no matter how minor, the image will not be sharp.
3. Use a Shutter Release
Like a tripod, a shutter release is another tool to use to create tack sharp images. Pressing the shutter button on the camera can cause the camera to shake. A shutter release is a tool that releases the shutter to start the exposure without touching the camera. The most common type of shutter release is a cable release, but there are also wireless shutter releases. If you are on a budget, utilizing the camera’s self timer feature is another great way reduce the chance for camera shake when the exposure starts.
4. Filters
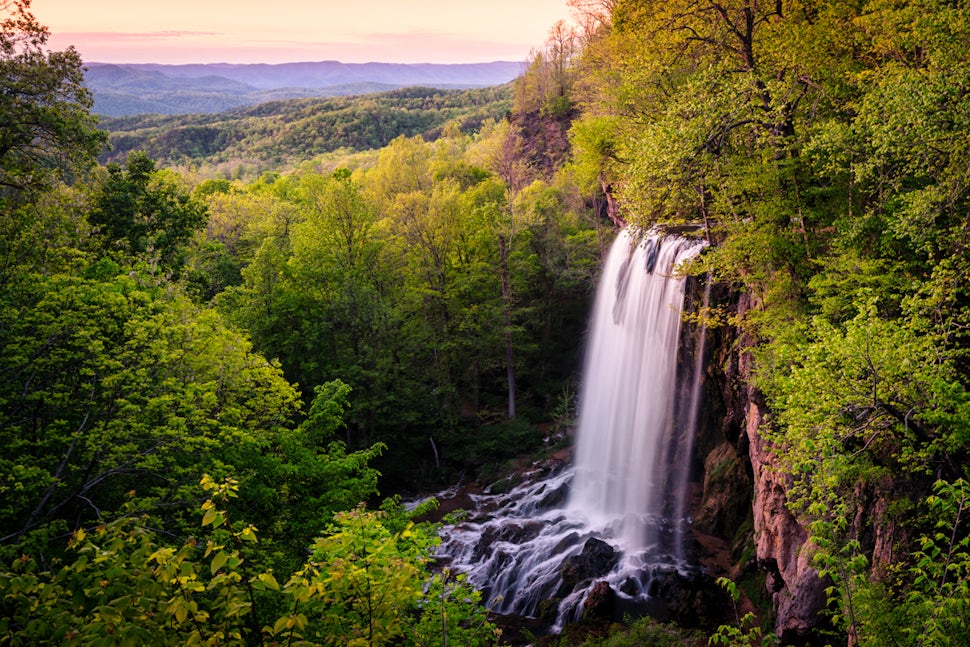
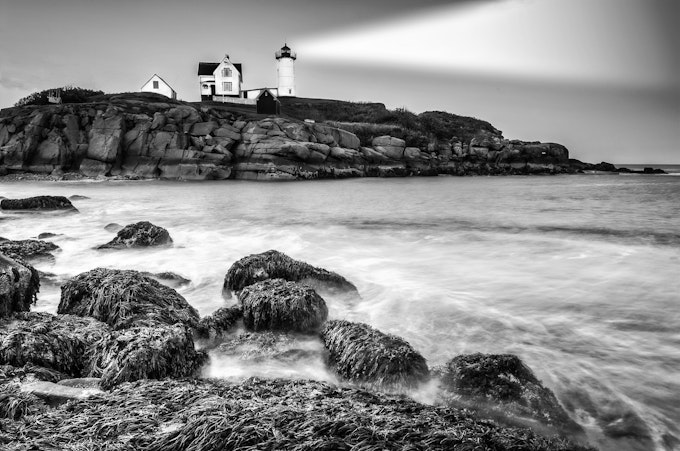
During the day, the use of filters is required to achieve the slow shutter speeds needed to show the movement in your image. Neutral density (ND) are the best filters to achieve the slow shutters speeds required for long exposure photography. ND filters are a dark piece of glass placed in front of the lens, reducing the amount of light passing through the lens. This allows photographers to use long exposures even on bright, sunny days. ND filters come in strengths that block anywhere from 3 to 15 stops of light. I used a 10 stop ND filter in the below image which allowed me to capture a seven minute exposure.
5. Manual Focus
One downside to ND filters, especially when using a filter 6 stops or greater, is that the camera autofocus will not work. The ND filter is so dark that it’s hard for you to see through, so there is little to no chance that your camera will be able to find something to focus on. To get around this, before you put the filter in front of your lens, compose your image, and use the camera’s autofocus to make sure the image will be sharp. Next, turn off your autofocus using the switch on the side of your lens. Push the switch to “M” or manual focus; this will ensure your lens will not try to refocus once the filter is on. Lastly, carefully place your ND filter on the front of your lens.
6. Close View Finder
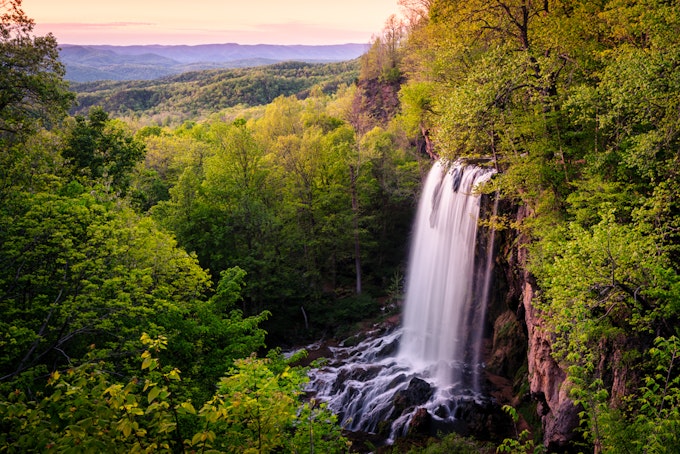
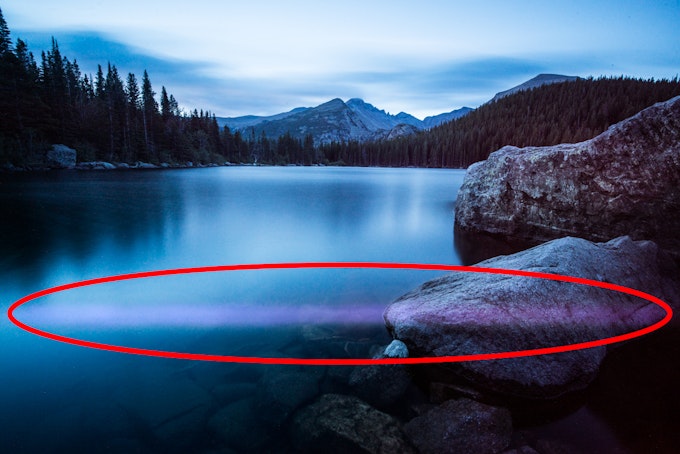
Since your eye will not be against the viewfinder after you compose your image, light creeps into the camera resulting in a purple line through the middle of the image ruining all of your hard work. When using a really long exposure, greater then 10 seconds, you will need to close your view finder. Some Nikon cameras have a built in viewfinder curtain, which will stop all light from entering through your viewfinder. Some Canon cameras come with a plastic eye cap that can be placed over your viewfinder. If you do not have either, the next best thing is a piece of gaffers tape. Placing a piece over your camera’s viewfinder will work allowing you to create amazing long exposure images. The below image has a purple line caused by light leak from my cameras viewfinder.
7. Composition
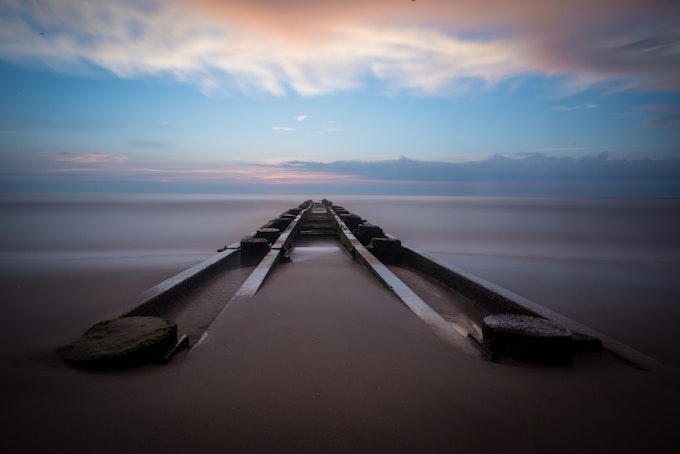
Having a great composition can make or break an image; just because you are taking a long exposure doesn’t mean that you do not have to take the time to find and compose your image. The key to composition is finding the subject and then composing the scene to draw the viewer’s eyes through the image to the subject. There are many different ways to compose the landscape, which makes it important to know the different rules in order to apply them to different situations. To learn more about photography composition techniques, click here.
We want to acknowledge and thank the past, present, and future generations of all Native Nations and Indigenous Peoples whose ancestral lands we travel, explore, and play on. Always practice Leave No Trace ethics on your adventures and follow local regulations. Please explore responsibly!
Do you love the outdoors?
Yep, us too. That's why we send you the best local adventures, stories, and expert advice, right to your inbox.


